Booking a luxury tent sounds dreamy until a quiet question creeps in: what happens when your phone hits 5% and there’s no wall socket in sight? Many travelers hesitate to book glamping because they can’t picture how a tent in the woods keeps the lights on. The truth is that glamping site power setups vary more than most people expect, and knowing the difference changes how you pack and which tent you book.
This guide walks you through the whole picture. We’ll look at the power sources sites actually use, how to charge phones, cameras and laptops on site, what lighting to expect inside and outside your tent, and which devices you can and can’t plug in. You’ll also learn how to check a site’s power setup before you book and how to pack a small power kit that covers any setup. By the end, you’ll know exactly what to expect before you zip that tent door shut.
What Power Sources Glamping Sites Actually Use
Not all glamping sites run on the same kind of power, and the difference matters more than the thread count of the sheets. Broadly, sites fall into four categories, and each one shapes what you can charge and when.
Grid-connected sites: the easy option
Grid-connected sites pull electricity from the local utility, just like a hotel. Outlets deliver standard 110-230V power depending on the country, so your chargers behave exactly as they would at home. If a listing mentions full hookups or powered sites, this is usually what you’re getting, and you can treat your tent like any other room with a wall socket.
Off-grid, hybrid and no-power setups
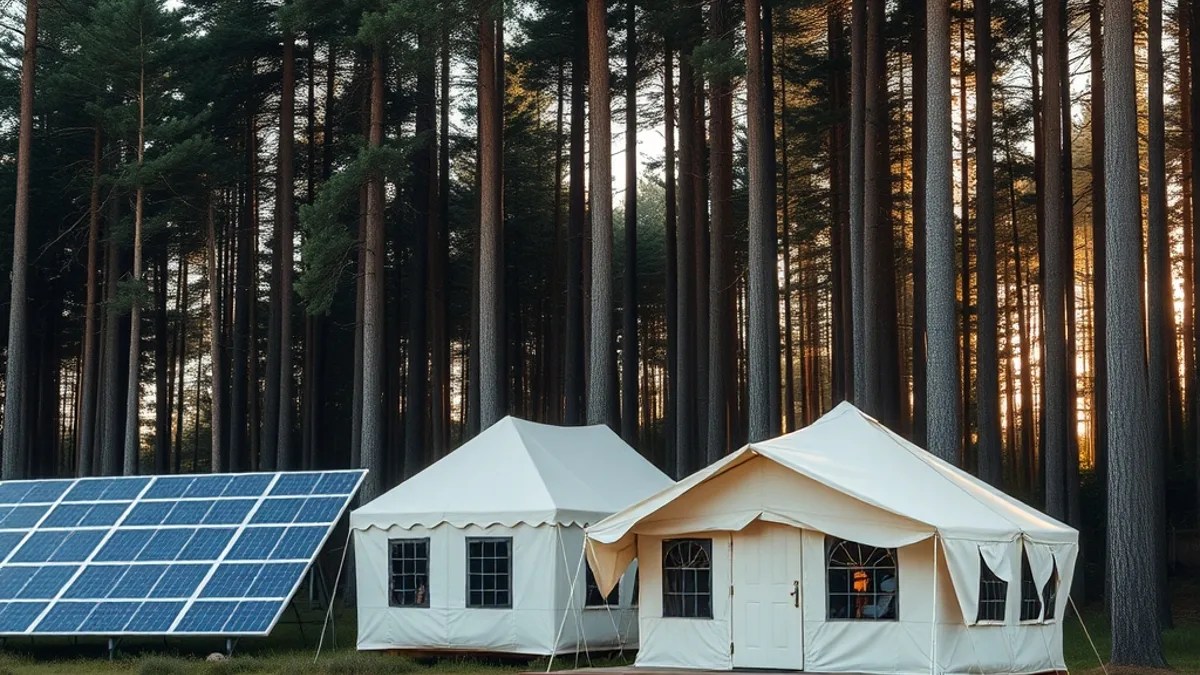
Off-grid sites rely on solar panels feeding 12V battery systems. That’s plenty for LED lights and USB charging, but it won’t run a hair dryer or a kettle. Hybrid setups combine solar with a backup generator that runs a few hours daily, which gives you a daily window for higher-draw charging. Then there are the most remote sites, which offer no in-tent power at all. Your only option there is a charging station in a shared lodge, so you’ll want a power bank to bridge the gaps between visits.
Before you book, figure out which of these four setups the site uses. Everything else about charging, lighting and outlets follows from that single answer.
Charging Phones, Cameras and Laptops On Site
The good news is that charging your everyday gear is rarely a problem. USB ports are standard in most glamping units, so phones and cameras usually top up without any extra effort. If you travel with several devices, bring a multi-port charger so you’re not swapping cables in the dark or waiting for one device to finish before the next one starts.
A power bank is your best backup, especially at sites where in-tent charging is limited. A 20,000mAh power bank covers roughly 4-5 phone recharges, which is enough to get you comfortably between lodge charging sessions. Laptops are a different story: they often need a proper AC outlet rather than a USB port, so confirm availability before booking if you must work from the tent.
Timing matters too. At off-grid and hybrid sites, charge devices during generator hours or daytime solar peaks rather than overnight, when battery reserves are lowest. A few habits make this easier:
- Top up in the morning sun. Solar systems are fullest by midday, so plugging in after breakfast puts the least strain on the batteries.
- Use generator windows for big devices. If the generator runs a few hours daily, that’s the time to charge laptops, cameras with large batteries or anything else that pulls serious power.
- Keep one device on the power bank. Rotate your power bank into the rotation and recharge it during peak hours, so you always hold a reserve for the evening.
- Turn on low-power mode overnight. Phones sip power while you sleep, and a reduced drain means you can often skip charging until the next sunny window.
Lighting: What to Expect Inside and Outside the Tent
Lighting is where glamping sites get creative, and it’s usually better than first-timers expect. Inside the tent, LED fixtures drawing 5-10W are the norm, a fraction of what household bulbs use. Most are on a dimmer or a separate switch, so you can drop the light to a soft glow for reading without draining the batteries.
Outside, solar pathway and string lights handle walkways, decks and dining areas. They charge all day and glow warmly after dark, but most switch off by late evening to save battery. That means a trip to the bathroom block at 2 a.m. can be genuinely dark, so pack a headlamp or rechargeable lantern for midnight trips where lighting is minimal. It’s a small item that earns its space in the bag every single time.
At off-grid sites, it also pays to ask one question before you arrive: do the lights run all night, or do they cut off on a timer? The answer shapes how you plan your evenings. A few extra details worth knowing:
- Timers often cut lights around midnight. At many off-grid sites, interior lights shut off automatically to protect the battery bank, so finish your reading before then or rely on your own lantern.
- Dimmers extend battery life. Running LED fixtures at low brightness uses far less power, so sites encourage guests to keep lights dimmed after a certain hour.
- Pathway lights depend on daytime sun. After a cloudy day, outdoor solar lights may be faint or off entirely, which is another reason a headlamp earns its place.
- Rechargeable lanterns can top up over USB. Plug yours into the same USB ports you use for your phone during the day, and you’ll have independent light no matter what the site’s system does overnight.
Outlets, Adapters and What You Can’t Plug In
Most glamping units, even off-grid ones, offer at least one or two outlets, but they come with a catch: they’re often limited to low-wattage use. The outlet may look identical to the one at home, yet it’s fed by a battery and inverter rather than the grid, and that changes what you can safely plug in.
What trips the system
Hair dryers, kettles and similar appliances typically draw 1,500-2,000W, which usually exceeds what an off-grid inverter can handle. Plug one in and you’ll likely trip the inverter, plunging your tent and possibly neighboring ones into darkness. Instead, use the shared lodge facilities, where sites usually keep kettles, hair dryers and other high-draw appliances connected to a sturdier power supply.
Bring the correct plug adapter for the country you’re visiting, since outlet shapes vary widely even between neighboring countries. If you travel with several devices, a small surge strip lets you charge everything from a single outlet, which matters when the tent only has one or two.
If you rely on a CPAP machine or other medical device, confirm with the site well before booking. Battery capacity varies a lot between properties, and some off-grid systems can’t support an all-night draw. Sites that can will often tell you exactly how to connect, so an email in advance removes the risk entirely.
How to Check Power Setup Before You Book
The fastest way to avoid power disappointment is to read the listing carefully and ask a few direct questions before you pay. Glamping sites vary enormously, and the description usually tells you more than the photos do. A glamorous tent photo says nothing about whether you can charge a laptop or run a CPAP machine overnight. Hosts who run good sites expect these questions and answer them quickly, so treat a vague reply as a warning sign. Here’s how to check the setup step by step before you commit to a booking.
- Scan the listing description for keywords. Phrases like “full hookup,” “solar powered” or “off-grid” signal what kind of system you’ll get. Full hookup usually means grid power and standard outlets, while off-grid points to a battery setup with limits. If the listing says nothing about power at all, that silence is itself an answer.
- Message the host directly. Ask how many outlets the unit has, what voltage they run at, and whether hair dryers or other high-draw appliances are allowed. A host who answers these questions clearly is also a good sign of a well-run site overall.
- Check availability timing for your dates. Powered safari tents and cabins for July-August stays often need booking 3-6 months ahead, while basic off-grid tents tend to stay available longer. If you need reliable power, book early rather than settling for whatever is left.
- Budget for the power difference. In the same area, sites with full hookups often charge 20-40% more than basic off-grid options. Decide whether guaranteed outlets are worth the premium for your trip, especially if you’re working remotely or traveling with medical devices.
Ten minutes of checking saves you from arriving with a laptop you can’t charge or a CPAP machine with nowhere to plug in. Write down the host’s answers so you can plan your packing around exactly what the site offers, and share them with anyone traveling with you. When hosts give specific answers about outlets, voltage and appliance limits, you can pack a power kit that matches reality instead of guessing.
Packing a Small Power Kit for Any Glamping Trip
A small power kit turns almost any glamping setup, from grid-connected cabins to solar-only tents, into a workable situation. The idea is simple: carry everything you need to capture and share whatever power the site offers, and nothing you don’t. The whole kit fits in a single pouch and weighs less than a paperback, so there’s no reason to leave it behind even if you’re flying in with carry-on luggage only.
Start with the core four items, then add extras based on how you’re traveling. If you arrive by car, you have one more charging option most travelers overlook: the vehicle itself. A 12V car charger keeps devices topped up during the drive and works as a backup at the site if you park close to your tent. Just idle the engine briefly rather than draining the battery overnight.
- Power bank: a 20,000mAh model recharges a phone roughly 4-5 times, enough to bridge the gap between charging sessions at the lodge or during generator hours.
- Multi-port USB charger: lets you charge several devices from one outlet or USB source at once, which matters when the tent has a single power point.
- Plug adapter: matches your chargers to the country’s outlet shape, so you’re not hunting for a borrow at reception.
- Short extension cord: a compact 3-4 foot cord reaches an outlet that’s mounted behind a bed or above head height, a common quirk in converted tents and cabins.
- Rechargeable headlamp: frees your hands for zipper fumbling and path finding on midnight trips where tent lighting is minimal.
One rule above all: skip high-wattage appliances entirely. Leave the travel kettle and hair dryer at home and rely on the site’s shared facilities instead. Your bag stays lighter, and the site’s battery system stays online for everyone. A few zip ties or a velcro strap to keep cords tidy, plus a spare charging cable, round out the kit without adding real weight.
Wrapping Up Your Glamping Power Plan
Power at glamping sites ranges from full grid outlets, identical to a hotel room, down to solar-only 12V systems that handle little more than lights and USB charging. That means the worry of phones dying or lights failing in the middle of nowhere usually comes down to one thing: knowing which setup your site runs before you arrive.
Once you know the setup, everything becomes predictable. Charging windows, lighting behavior and outlet limits all follow from whether the site is grid-connected, solar powered or fully off-grid. Pack a small power kit, ask the host one clear pre-booking question about outlets and high-wattage devices, and you remove almost every power surprise from your trip. If this helped you plan your own stay, leave a comment or share the article with a fellow traveler.