Dark clouds are stacking up on the horizon, the forecast just flipped from sunny to steady rain, and you’re starting to wonder if your carefully planned getaway is about to become a soggy write-off. It’s a familiar feeling for anyone who has booked a tent, dome or cabin months in advance, only to watch the weather turn a few days before departure. The good news: it doesn’t have to ruin anything.
Done right, rainy day glamping can be the coziest version of the trip you booked. In this guide, we’ll look at why wet-weather trips are often the best ones, how to choose a unit that genuinely stands up to rain, and how to book smart for the shoulder season. We’ll also cover what to pack, how to stay warm and dry inside the tent, and how to make the most of a rainy day outdoors — so the weather becomes atmosphere instead of a problem.
Why Rainy Day Glamping Can Be the Best Version of the Trip
There’s a quiet case to be made for traveling when the forecast isn’t perfect. In most temperate regions, the shoulder-season months of April–May and September–October bring the highest chance of rain — and also some of the best value. Rates drop outside the summer peak, and the landscapes take on a moody, atmospheric quality that bright, busy summer days simply don’t offer: mist curling through valleys, dramatic skies over open water, forests smelling of rain.
Quieter sites, better hosts
Fewer crowds change the whole feel of a glamping site. You’ll often have more space between neighbors, quieter evenings, and hosts who have more time to chat, share local tips or make sure your firewood is stacked. It’s a more personal version of the experience, and it usually costs less.
Rain makes the good stuff better
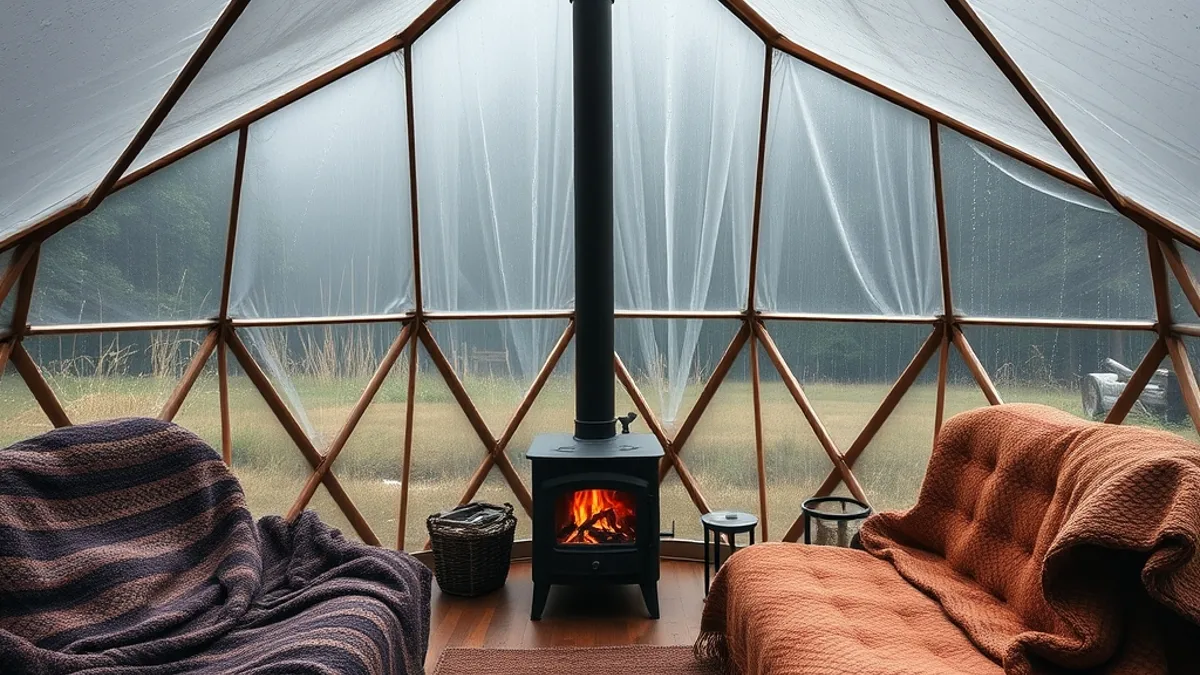
Here’s the part frequent glampers know: rain amplifies the appeal of everything cozy. A wood stove crackling while drops patter on the canvas, a steaming hot tub under an umbrella of trees, a panoramic window framing a storm rolling past — these moments only hit that hard when the weather outside gives them contrast. Instead of hoping for sunshine, plan for rain and let it work in your favor.
Choosing a Wet-Weather-Proof Glamping Unit
Not all glamping units handle rain equally well. A fair-weather summer tent that leaks at the first seam can turn a romantic trip into a miserable one, so it pays to check the specs before you book. Canvas and synthetic fabrics are typically rated 3,000–5,000 mm hydrostatic head for reliable rain protection — anything in that range should shrug off a proper downpour. Hard-sided domes and cabins are another strong option, since solid walls don’t rely on waterproofing treatments at all.
Beyond the fabric itself, look at the details that keep water moving away from you rather than toward you. Some of the best wet-weather setups we’ve stayed in — including the kind of Atlantic-facing retreats you can read about in homes built for Atlantic weather and deep Irish quiet — get these fundamentals right:
- Raised floors: a platform lifted off the ground keeps standing water, mud splash and rising damp out of your living space, even after hours of heavy rain.
- Covered verandas: a roofed outdoor area means you can still cook, sit and watch the weather without getting soaked or tracking water inside.
- Sealed zip doors: quality weather-sealed zips with storm flaps stop wind-driven rain from creeping through the entrance — the most common leak point on cheaper units.
One thing to budget for: a 4-season glamping tent or dome usually costs 25–50% more per night than a standard summer unit. In wet months, we think that premium is worth every cent — it’s the difference between enduring the rain and enjoying it.
Booking Smart for the Rainy Season
Booking for a rainy-season trip looks a little different from booking a summer getaway. The units that genuinely handle wet weather — the ones with stoves, solid construction and covered outdoor space — are limited in number at most sites, and they book out faster than you might expect. While a standard summer tent might sit vacant midweek, a four-season dome with a wood stove can be fully committed weeks in advance. A little strategy up front saves a lot of disappointment later. Here’s how we’d approach it:
- Reserve wet-season-ready units 2–3 months ahead. That window is usually enough to secure a four-season dome or stove-equipped cabin. Dry-season peak slots, by contrast, often need 6+ months’ lead time, so shoulder-season travel is actually easier to book at short notice. If your dates are flexible, midweek arrivals typically give you the widest choice of the best units.
- Ask the host direct questions before paying. Confirm the wood stove is available and functional during your dates, ask exactly how much covered outdoor space you’ll have, and check how the site handles drainage around the unit after heavy rain. If you’re arriving by car, also ask about parking distance — hauling gear across a sodden field is nobody’s idea of a good start.
- Read the cancellation terms carefully. Shoulder-season weather is less predictable than high summer, so flexible or moderately flexible cancellation policies give you a safety net if a storm system settles in for the week. Some hosts also offer date changes rather than refunds, which can be a useful middle ground.
It’s also worth putting those host questions in writing, so you have the answers on record. A host who replies quickly and specifically about stoves and drainage is usually a host who takes wet-weather comfort seriously — a good sign for the whole stay. Vague or evasive answers, on the other hand, are reason enough to keep looking.
Packing for Rainy Day Glamping
Packing well is what separates a soggy, miserable trip from a cozy one. The biggest mistake glampers make is treating a wet-weather trip like a summer one and tossing everything into an open duffel. Once rain gets into your bag, your bedding, spare clothes and electronics all suffer together. A waterproof duffel is the foundation, and dry bags inside it keep the essentials protected even if the duffel ends up on a wet floor or under a leaky awning.
The second rule is simple: assume everything gets damp eventually. Even the best tent collects condensation, and gear hung up to dry rarely returns to full dryness in humid weather. That is why quantity matters — pack one spare set of clothes per two days of expected rain, so a soaked morning never forces you into yesterday’s damp jeans. Cotton is the enemy here; once wet, it stays wet and cold. Synthetic or merino layers, waterproof boots and microfibre towels all dry far faster and pack smaller.
- Dry bags by category: separate bags for electronics, bedding and clothing mean one splash or spill never ruins everything at once — a small 5–10 liter bag for phones and chargers is enough.
- Two pairs of footwear: bring waterproof boots for outside and a slip-on pair for inside the tent, so you never track mud onto sleeping areas or across a wooden floor.
- Microfibre towels in two sizes: a large one for your body and a small one for wiping down tent walls, window condensation and wet chair seats.
- A stuff sack for dirty gear: keeping wet, muddy clothing quarantined at the end of the trip protects your car and your clean laundry on the drive home.
- Headlamp with fresh batteries: rainy days mean dim interiors by mid-afternoon, and hands-free light makes cooking, reading and stove-tending far easier than a phone flashlight.
Staying Warm and Dry Inside the Tent
Once you are inside, the goal is to manage heat, moisture and airflow rather than fight them. A wood stove is the heart of any wet-weather glamping setup, and it makes a real difference: these stoves can lift interior temperatures 15–20°C above the outdoors. That turns a cold, drizzly evening into the best part of the day. But a stove is only pleasant if you understand it before dark, so ask your host for a walkthrough on arrival or read the instructions while there is still daylight.
Learn the Damper Before Nightfall
The damper controls how much air feeds the fire, and getting it wrong means either a room that’s too hot to sleep in or a fire that smolders and smokes. Practice opening and closing it while the stove is cold, learn how the air intake works, and figure out how to bank the fire for a slow overnight burn. Fumbling with these controls at midnight, in the dark, while smoke drifts into the room, is nobody’s idea of glamping.
Manage Moisture Where You Sleep
Wet jackets, boots and towels release moisture continuously, so keep them in a vestibule or dedicated drying area away from your sleeping zone. This keeps bedding dry and prevents that clammy, damp-sheet feeling that ruins a night’s sleep. In the morning, open a vent or zip for a few minutes to let humid air escape — brief ventilation cuts condensation on walls and windows without losing much of the stove’s stored heat. If you want inspiration for units where the inside feels as dramatic as the view, this piece on cozy interiors with wild volcanic views shows how well it can be done.
Making the Most of a Rainy Day Outdoors
Rain changes the rhythm of a glamping trip, and that is not a bad thing. Instead of long, committed hikes, think in short bursts: a 20-minute walk between showers, then back to shelter before the next band of weather rolls in. Clouds often build and break in cycles, so watching the sky from a covered deck tells you when to head out and when to stay put. Many units offer verandas or deck canopies that add 5–15 m² of usable rainy-day space — enough room for a small table, two chairs and a kettle.
Slow activities are the real luxury here. A pot of coffee, a board game and a wide window facing the weather can fill an entire afternoon better than any itinerary. The trick is to plan for it: bring things to do and food that suits slow cooking, rather than expecting to improvise once the rain sets in.
- Move cooking under cover: a camp stove or grill set up on a covered deck lets you cook through a downpour — just keep fuel and matches in a sealed bag nearby.
- Bring a compact game kit: cards, dice and a travel board game take almost no packing space and hold up far better than screen-based entertainment when batteries run low.
- Pick a window seat early: claim the chair with the best view before the rain starts, and keep a blanket and thermos within reach so storm-watching becomes a ritual rather than an afterthought.
- Time walks to the forecast: check the radar on your phone, aim for the driest gap in the day, and choose loops rather than out-and-back routes so you can cut a walk short if the weather turns.
- Pack a thermos for excursions: filling it with a hot drink before a short walk turns a damp 30 minutes outside into something you’ll remember fondly.
Wrapping Up Your Wet-Weather Glamping Plan
So, is a rainy glamping trip a soggy write-off? Not even close. Wet-weather trips reward the right preparation: a unit built for the conditions, smart booking a couple of months ahead of your shoulder-season dates, and a packing list that keeps your gear and bedding dry no matter what the sky is doing.
Get those three things right, and the rain stops being a problem and starts being the atmosphere. A wood stove pushing the tent 15–20°C warmer than outside, a covered deck for your morning coffee, and a gray, moody landscape beyond the window — that’s not a compromised trip, it’s arguably the best version of one. If you’ve had a memorable glamping trip in the rain, share your story in the comments, or pass this article along to someone planning a wet-weather escape.