Most glamping sites are built on uneven ground with steps, gravel paths and raised decks, which leaves travelers with limited mobility unsure which stays are actually usable. A listing that looks perfect in photos can turn out to have three steps up to the deck, a bathroom down a sloping path, or a shower you simply cannot get into. That gap between marketing and reality is why glamping accessibility deserves its own research process, not just a quick skim of reviews.
This guide walks you through what a genuinely accessible glamping stay looks like, from entrance ramps and doorway widths to showers and paths. You will learn which stay types work best, how to verify a listing before you book, when to reserve for the best availability, the questions worth asking every host, and which destinations and terrain make step-free glamping far easier to find.
What Glamping Accessibility Really Means
Real accessibility starts at the entrance. A unit labeled “ground floor” can still have two steps up to the door, or a ramp so steep it is unusable with a manual wheelchair. What you need is a true step-free entrance, either a ramp with a slope of about 1:12 or gentler, or a level deck that meets the ground without any threshold to climb. Ask specifically how you get in, not whether the unit is on the ground floor. A photo of a smiling guest on the porch tells you nothing about the angle of that ramp.
Inside, the measurements matter as much as the entrance. A doorway that looks open in photos can measure well below the practical minimum, and a beautiful tent interior is useless if a wheelchair cannot turn around in it. The bathroom deserves equal scrutiny, because a standard shower tray with a raised lip will stop many travelers before they get wet. Here is what to look for in any listing:
- Step-free entrance: a ramp at roughly 1:12 or gentler, or a level deck, with a threshold low enough to cross without lifting the chair or walker.
- Doorway width: at least 32 inches (81 cm) at the unit entrance and bathroom door, since narrower openings force side transfers or block entry entirely.
- Turning space: roughly 5 feet of clear interior space so a wheelchair can rotate without scraping furniture or catching on tent poles.
- Bathroom setup: a roll-in or walk-in shower with grab bars, plus a raised toilet height that makes transfers manageable.
- Paths from parking: hard-surfaced routes from your parking spot to the unit, because gravel and grass defeat wheelchairs and walkers even over short distances.
Treat these five points as a checklist rather than a wish list. If a host can answer each one with a specific number or a photo of the exact unit, you have likely found a genuinely accessible stay. If the answers get vague, keep searching. The extra ten minutes of checking now is far easier than arriving with a wheelchair that cannot get through the door.
Stay Types That Work Best for Limited Mobility
Not all glamping structures are equal when it comes to mobility, and the differences come down to one thing: how the unit meets the ground. Safari tents and cabins built on fixed wooden decks are the most reliably level option. The deck creates a flat, stable surface, and many sites have already added a ramp to at least one unit. Ask which specific tent or cabin sits on the most accessible deck, because within a single site the layouts often differ.
Yurts, domes and curved walls
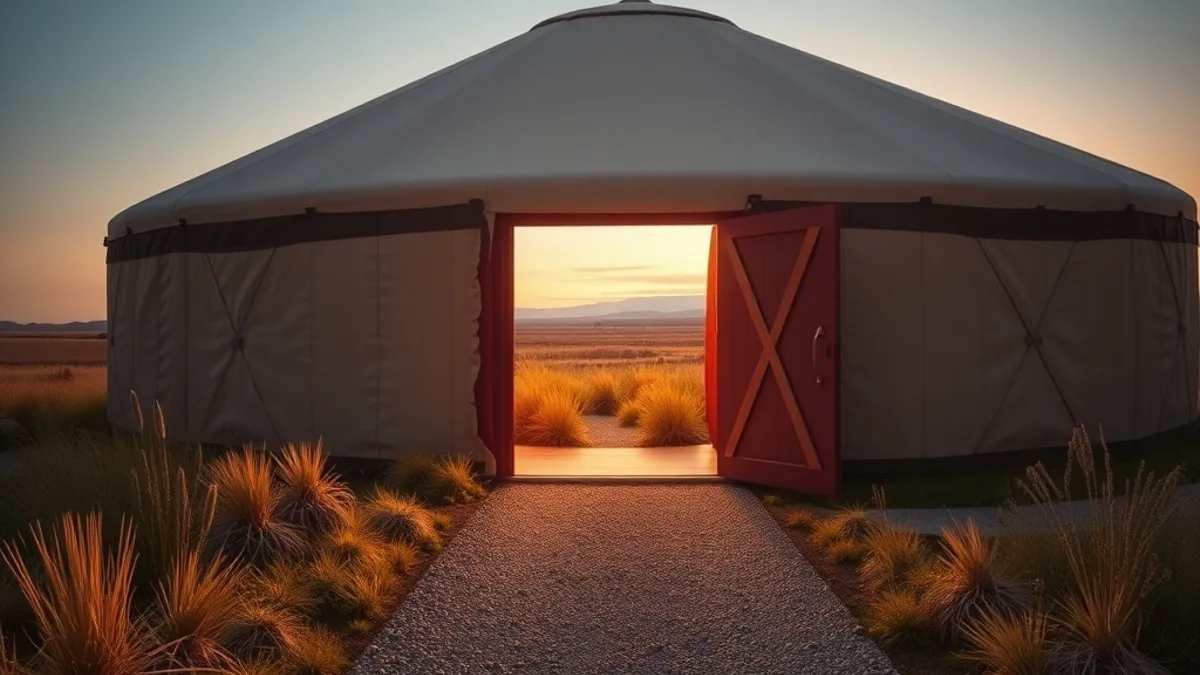
Yurts and domes can work if they sit on decks with proper ramps, but their curved doorways often narrow below 32 inches, which is the practical minimum for a wheelchair. The round shape also eats into interior turning space, so request exact doorway measurements before assuming a decked yurt will work.
Stay types to treat with caution
Treehouses and units on raised platforms almost always mean stairs, sometimes many of them. Unless the site confirms a lift or a long, gentle ramp, treat these as unsuitable rather than hoping for an exception. On the other end of the scale, converted barns and lodge-style glamping rooms usually offer the widest doorways and true en-suite bathrooms, since they were built as permanent buildings rather than adapted later. If a site offers both tents and a lodge wing, the lodge side is often the easier booking.
How to Verify a Listing Before You Book
Listing photos are marketing first and information second. Sites routinely show their best tent, their sunniest deck and a manicured lawn, none of which tells you whether the unit you are booking has a usable ramp or a roll-in shower. A glossy gallery can make even a site with a single awkward step at the entrance look fully adapted. Verifying accessibility means asking for specifics, in numbers where possible, before any money changes hands, and treating every answer as something to confirm rather than assume.
- Request photos of the exact unit. Ask for pictures of the ramp, the bathroom and the path from parking, not the site’s general gallery. Marketing images of a different tent tell you nothing about the one you will sleep in, and hosts of genuinely adapted units can usually send these within a day.
- Get measurements in numbers. Ask for the ramp slope and the doorway width in figures. Vague answers like “mostly flat” or “wheelchair friendly” are a red flag; a confident host who has adapted a unit will know the numbers off the top of their head.
- Pin down the shower details. Confirm whether the shower is genuinely roll-in, whether a fold-down seat is installed, and whether grab bars are fixed to the wall rather than available on request. “Accessible bathroom” alone can mean almost anything.
- Map the on-site terrain. Ask how far the unit sits from parking, what material the path is made of, and whether any steps separate you from dining areas or shared facilities you plan to use. A perfectly adapted cabin is little use if the restaurant or fire pit sits down a gravel slope.
A host who answers these questions quickly and precisely is telling you something important: they have thought about accessibility before. Hesitation, deflection or generic reassurance usually means the unit was never adapted in the first place, and you are better off continuing your search elsewhere. It may take a few extra emails to sort the genuinely adapted sites from the ones using “accessible” as a keyword, but that effort is far easier than arriving with a wheelchair and discovering a flight of steps where a ramp should be.
Booking Timing and Season Strategy
Accessible glamping units are scarce, and that scarcity shapes your entire booking timeline. Most sites hold only one or two adapted units, so the standard advice of booking a few weeks ahead simply does not work here. Plan to reserve three to six months in advance to give yourself real choice instead of whatever happens to be left.
In popular regions, the situation is even tighter. Peak-season accessible units can sell out six or more months in advance, especially at well-known coastal and lakeside resorts where a single adapted cabin serves everyone who needs one. If your dates are fixed around school holidays, treat early booking as non-negotiable.
Why shoulder seasons work in your favor
Targeting May-June or September-October solves two problems at once. Availability improves because fewer travelers compete for the one or two adapted units, and rates typically run roughly 10-20% below July-August peaks. Weather in these months is also kinder to paths and decks, which matters when a wet, slippery ramp is a genuine safety issue.
Finally, book direct by phone wherever possible. A third-party listing can lose or garble accessibility details, but a direct conversation lets you confirm ramp slope, doorway width and shower setup with the person who actually manages the unit. Ask them to repeat the key points in an email so you have everything in writing before you pay.
Questions to Ask the Host Before Paying
A short, focused conversation with the host will tell you more than any listing description ever will. Hosts who manage a genuinely accessible unit answer specific questions quickly and comfortably, often with measurements ready. Vague or defensive replies are useful information too, because they usually mean the unit was adapted casually rather than built with limited mobility in mind. Treat hesitation as data, not rudeness.
Before you send money, get the answers in writing, ideally with photos or video attached. Ask for images of the exact unit you will sleep in, not marketing images of the site in general. Here are the four questions that matter most, and why each one earns its place on the list.
- Is the entire route from accessible parking to the unit step-free, including shared facilities? A step-free cabin means little if the restaurant, pool or shared bathrooms sit down a flight of stairs or across a gravel field. Ask specifically about every area you plan to use, and ask whether any ramp on that route follows a gentle slope rather than a steep, improvised one.
- Is there a roll-in shower, and what is the exact doorway width of the unit entrance? Push for numbers rather than adjectives. A doorway measured at 32 inches is workable; “wide enough for most people” is not an answer you can plan around. Confirm the measurement applies to the bathroom door as well, since interior doors are often narrower than the entrance.
- Can the host send a short video walkthrough of the unit and path? A phone video filmed on the spot shows the real ramp, the real bathroom and the real surface between parking and door. Marketing galleries rarely include any of these, and a host willing to film one is usually a host with nothing to hide. Ask them to pan slowly so you can pause and check details.
- What is the cancellation policy if the unit does not match the accessibility description? Even careful verification can miss something. Ask in advance what happens if you arrive and find steps where a ramp was promised, and whether you can expect a full or partial refund. Get the policy in writing with your booking confirmation.
Keep the whole exchange in one email thread if you can, and follow up any phone call with a short summary email the host can confirm. If a dispute arises later, that thread becomes your record of exactly what was promised, which makes resolving it far simpler.
Destinations and Terrain That Make Glamping Accessibility Easier
Where you go matters almost as much as which unit you book. Flat coastal and lakeside sites generally beat hillside and forest-slope sites for step-free layouts, because level ground makes ramps shorter, decks easier to build and paths from parking far more predictable. A cliffside tent with a view may look spectacular online, but that view usually comes with stairs, switchbacks or a steep gravel track.
Mediterranean coastal regions are a particularly safe bet. Long dry seasons keep paths firm and usable for most of the year, so you avoid the mud and soft ground that can turn an otherwise accessible route into an obstacle course after rain.
Reading between the marketing lines
Be cautious with sites that lean heavily on words like “seclusion” and “hidden.” These phrases usually signal rough access tracks, long unpaved driveways and terrain that defeats wheelchairs and walkers. A site proud of its accessibility tends to say so plainly and show it in photos.
Size helps too. Established glamping resorts with multiple units are far more likely to have one purpose-built accessible unit than single-cabin sites, where the owner may have made well-meaning but improvised adaptations. Coastal destinations built around easy, level living are a natural fit; coastal stays such as Trancoso beach houses with warm light and easy coastal elegance show how flat, beachfront settings lend themselves to step-free design. Whichever destination you choose, verify the specifics with the host before booking.
Wrapping Up Your Accessible Glamping Search
Finding glamping you can actually use comes down to verification. Most sites sit on uneven ground with gravel paths, steps and raised decks, so a listing labeled “accessible” is only the starting point. Check the ramp, the doorway width, the roll-in shower and the path from parking before you trust any label.
Stick to deck-based safari tents and cabins, since treehouses and steep hillside sites rarely work. Book 3-6 months ahead, and aim for May-June or September-October when availability is wider and rates are lower than the July-August peak. Most importantly, confirm every accessibility detail with the host in writing before you pay. If a stay has worked well for you, or you have a tip for other travelers with limited mobility, leave a comment or share this article.