Picture this: night two of your dream glamping trip, and a storm rolls in. Will the site keep you dry and comfortable, or will your luxury tent turn into a soggy letdown with a puddled floor and a damp sleeping bag? The answer depends almost entirely on how well the operator planned for wet weather before you ever arrived. The truth is that the best glamping sites handle rain through deliberate design decisions, not luck.
This guide walks you through the three-layer defense smart operators build, the drainage details you can spot before booking, and the covered walkways and shelters that make a downpour irrelevant. We will also look at what should be inside the tent, how to time your booking for wet conditions, and how to find sites with genuine rainy-day plans. By the end, you will know exactly which questions to ask before you reserve.
How Glamping Sites Handle Rain: The Three-Layer Defense
Rain does not have to ruin a glamping trip, but it will expose a poorly planned one fast. The best operators think about wet weather in three distinct layers, each catching problems the previous one misses. When you understand these layers, you can size up any site within minutes of browsing its photos or talking to its team.
Layers one and two: ground and structure
Layer one is site selection, and it happens long before a single tent is pitched. Operators in high-rainfall regions — areas receiving 1,500 mm or more of rain annually — choose sloped, well-draining ground before anything else. Water flows downhill naturally, so a smartly chosen site does half the drainage work on its own.
Layer two is infrastructure. Well-built decks sit 30-60 cm above ground level, which keeps tent floors dry even when standing water collects below. This gap between tent and ground is one of the clearest signs an operator has invested real money in wet-weather resilience rather than just placing a tent on a lawn.
Layer three: how it feels as a guest
Layer three is guest experience. Covered walkways, sheltered fire pits and all-weather lounges are what turn a rainy stay from merely survivable into genuinely enjoyable. Many sites survive a storm with the first two layers; only thoughtful ones make you glad it rained.
Here is a simple tip: ask operators directly which of the three layers they have invested in. A confident, specific answer tells you they take wet weather seriously. Vague or evasive replies tell you something too.
Drainage: What to Look For Before You Book
Drainage is the least glamorous part of a glamping site and the most important one when the forecast turns. The good news is that good drainage is visible if you know what to look for, both in listing photos and in reviews. You do not need any technical knowledge — just a few pattern-recognition habits.
Start with the ground itself. Gravel paths and French drains running along tent perimeters signal deliberate water management, not an afterthought. Gravel lets rain soak through instead of turning to mud, while a buried drain line quietly carries water away from the tent before it can pool. Operators who install these have clearly thought about storms in advance.
Then look at the decks. Deck edges with open slats or gaps let rainwater fall straight through instead of pooling underfoot, so you are never stepping onto a shallow pond on your way to the door. Sites on a visible slope, with water directed away from units toward swales or shallow ditches, typically dry out within hours of heavy rain — often by the time you finish breakfast.
Location matters as much as construction. A site like those featured in a guide to slow countryside hideaways in Provence shows how gentle, well-drained slopes make rural stays comfortable even in changeable weather. Meanwhile, watch out for the warning signs:
- Bare mud around tent bases — this usually means foot traffic plus rain on unprotected soil, and it gets worse with every shower rather than recovering between them.
- Standing puddles in listing photos — if the operator’s own marketing images show water pooled near units, the drainage problem is significant enough to appear even in flattering shots.
- Units placed in natural hollows — tents set in dips or depressions collect every drop that falls nearby; water always finds the lowest point on a site.
If you spot two or more of these red flags, keep browsing. Rain amplifies whatever flaws a site already has.
Cover That Counts: Walkways, Canopies and Sheltered Living
Good drainage protects the tent, but good cover protects your trip. The difference between a rainy stay you endure and one you enjoy usually comes down to how much of the site remains usable when the sky opens. Well-designed operators treat cover as a core feature, not a bolt-on.
Walkways and covered zones
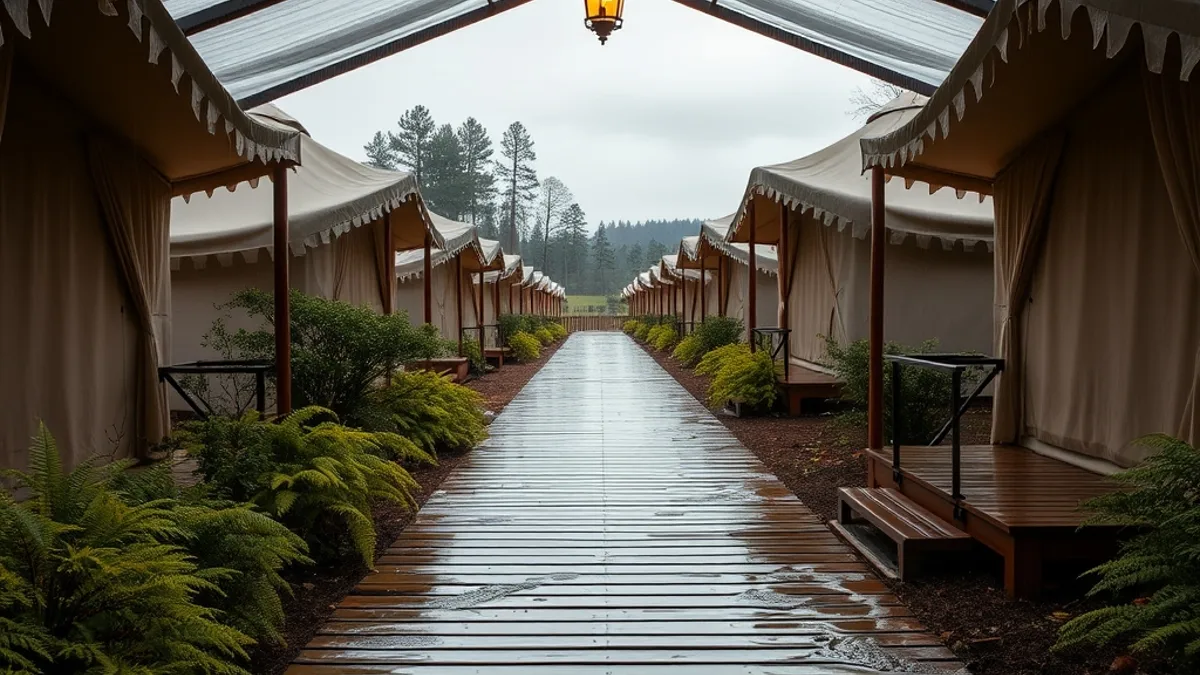
Start with the walk between your bed and breakfast. Covered walkways typically span 10-40 m between units and shared facilities like dining areas or bathroom blocks, which means no wet dashes in a downpour and no ruined socks before dinner. On a site without them, even a short trip to the shower becomes a strategy session involving raincoats and towels.
The best sites go further and offer 2-3 covered outdoor zones: a dining canopy, a fire-pit shelter and a covered lounge or veranda. This matters because rain rarely lasts all day, and with multiple sheltered spaces you can move with the weather instead of being trapped in one room. Morning coffee under the veranda, lunch in the dining canopy, evening by the sheltered fire — the day keeps its rhythm.
Roof types and rainy-day perks
One detail worth checking before you book: hard-roofed canopies beat fabric awnings in sustained rain. Fabric may look romantic in photos, but it drums, sags and eventually seeps during long storms, while a solid roof keeps its space dry and quiet. Ask the operator which type they use — it is a revealing question.
Finally, look for covered wood-fired hot tubs and saunas. These turn a rainy day into a highlight rather than a write-off: there is something close to magical about soaking in warm water while rain patters on a roof a meter above your head. Sites that provide this are not just tolerating the wet — they are designing for it.
Inside the Tent: Wet-Weather Comfort Features
Step inside a glamping unit on a wet day and you will know within minutes whether the operator has actually experienced a storm or just read about one. The first thing to check is gear storage: a quality site dedicates roughly 1-2 m² per unit to keeping wet kit out of your living space. Drying racks, boot trays and sturdy hooks mean muddy jackets hang in a corner instead of over your bed.
Heating is the second pillar. Tents cool and dampen quickly in shoulder months, and a wood stove or an efficient heater does more for comfort than any decorative cushion ever will. Ask how the unit is heated and how long it takes to warm up after a cold, wet arrival.
The features below make the biggest difference between a cozy night and a clammy one:
- Solid flooring or full-height platform walls: these block ground moisture that fabric-only walls slowly absorb, which is why canvas that touches the earth often feels damp by morning even without a leak.
- Ensuite bathrooms inside or directly attached to the unit: no midnight walk across a soaked field to a shared block, which is easily the worst wet-weather trek in camping.
- Ventilation paired with heating: trickle vents or adjustable openings let moist air escape so windows and canvas do not drip condensation back onto bedding.
- Quick-dry textiles: synthetic bedding and towels rather than heavy cotton, since anything that gets splashed should be dry again within hours, not days.
When you message a site before booking, ask directly about storage, heating and bathroom access. Operators who answer with specifics — stove type, rack size, where the bathroom sits relative to the bed — are the ones who have hosted rain many times before.
Booking for the Wet: Seasons, Lead Times and Prices
Rain-ready glamping sites in popular regions rarely have gaps in their calendar for May through September. The best ones typically book 3-6 months ahead, so if you want a dry-floor guarantee in peak season, reserve early instead of gambling that a last-minute cancellation will appear. Waiting usually means choosing between the leftovers: poorly sited units or premium prices on whatever remains.
Shoulder seasons are the smart traveler’s workaround. April-May and September-October often run 20-40% below summer peak rates, and the weather frequently brings manageable showers rather than dramatic summer storms. You trade a few degrees of warmth for quieter trails, better availability and a lower bill. For a sense of what a well-built, weather-ready site looks like in a genuinely wet corner of Europe, see this Irish hideout built for Atlantic weather.
Read the reviews the right way
Listing photos show a site on its best day. Reviews show it on its worst. Search recent guest feedback specifically for mentions of rain, leaks, mud or drainage — guests describe water problems far more honestly than any marketing copy. One detailed note about a soaked path or a dripping canvas tells you more than a dozen sunny photos.
Ask about the wet-weather policy
Before you pay a deposit, ask what happens if the forecast turns bad. Confident operators offer flexible rebooking or indoor activity credits; hopeful ones offer a shrug. The answer tells you whether the site has planned for rain or simply priced for sunshine.
Rainy-Day Activities: Sites That Plan for Wet Days
The difference between a rainy trip and a ruined one often comes down to what a site keeps indoors. Strong operators stock the unglamorous essentials: a shelf of board games, a small book library, and sometimes covered craft or cooking workshops that turn a washed-out afternoon into the part of the trip you remember. None of this is expensive to provide, which is exactly why its absence is telling.
Water-focused amenities flip the script entirely. An on-site spa, sauna or hot tub gives rain a purpose rather than an interruption — there is something deeply satisfying about sitting in steaming water while droplets patter on the surface above you. If a site advertises either, ask whether it is covered and bookable by the hour, so a wet day becomes a spa day instead of a scheduling problem.
Location as a wet-day strategy
Geography matters too. Sites within a short drive of towns, cafés and museums let you pivot from a morning trail walk to a dry afternoon indoors without losing the day. A remote site with nothing nearby leaves you entirely at the mercy of the sky, however beautiful the setting.
Get the plan in writing
When you book, ask the host for a written wet-day plan: what is covered, what is stocked, what is nearby. Good operators answer within hours and with specifics — a list of games, the sauna booking system, the ten-minute drive to the nearest town. Vague replies about “plenty to do” usually mean the site has never thought about it, and you will be the one finding out in the rain.
Wrapping Up: Choosing a Glamping Site That Shrugs Off Rain
So, back to that storm on night two: whether your tent stays cozy or turns soggy depends almost entirely on the operator, and the clues are easy to spot. Run the three-layer test — smart siting, real drainage infrastructure and covered guest areas — and rain-ready sites separate themselves from fair-weather ones quickly.
Inside the unit, check for gear storage, heating and ensuite access; outside it, look for covered walkways. Timing helps too: shoulder-season bookings in April-May or September-October can save 20-40%, and the best rain-ready sites reward early planning of 3-6 months. Get these details right and rain stops being the thing that ruins the trip — it becomes atmosphere, drumming softly on the canvas while you stay warm and dry. If this helped you plan a drier adventure, leave a comment or share the article.