If you’re planning your first time glamping, you’ve probably asked yourself the same questions every beginner does: will the tent actually be warm at night, will there be a real bathroom, and did you just pay hotel prices for something closer to camping? Those worries are common for good reason — glamping covers everything from hotel-grade domes to barely-upgraded canvas, and the difference isn’t always obvious from a few photos.
This guide walks you through the whole process, starting with what glamping actually is and the comfort levels you can realistically expect. From there, you’ll learn how to choose the right type of unit for your tolerance for roughing it, when to book for the best rates, and exactly what to pack. We’ll also cover what arrival day looks like, how to pick a beginner-friendly destination, and a few closing tips to wrap up your first stay. Read it before you book, and your first night under canvas should feel like an adventure — not a surprise.
What Glamping Actually Is — and What It Isn’t
Glamping — glamorous camping — covers a much wider range of accommodation than most first-timers realize. On one end, you’ll find safari tents with proper king beds, wood stoves and furnished decks. On the other, geodesic domes with panoramic windows, treehouses perched in the canopy, and compact A-frame cabins that feel like tiny boutique hotels in the woods.
The defining difference from regular camping is what comes included. Most glamping units have heating of some kind, real mattresses on proper frames, and linens already made up when you arrive. Many also offer private bathrooms, either attached to the unit or in a dedicated facility just steps away, so you’re rarely queueing at a communal shower block like you would at a campground.
Comfort levels vary more than you’d expect
Here’s the catch: “glamping” has no fixed standard. Some sites are genuinely hotel-grade, with daily housekeeping, espresso machines and heated floors. Others are what seasoned travelers call fancy camping — a nice tent, but with shared washrooms, limited power and no kitchen beyond a camp stove. Neither is wrong, but the gap between the two can make or break a first trip.
Before booking, read the unit description carefully rather than relying on category labels or photos. Look for explicit mentions of heating, bathroom access, power and cooking facilities. If the listing is vague about any of these, that vagueness is information — message the host and ask directly. Ten minutes of checking now saves you a cold, awkward night later.
Choosing the Right Type of Glamping Stay for Your Comfort Level
Your first glamping trip should remove friction, not add it. The two biggest shock factors for beginners are cold nights and bathroom logistics, so prioritize units that solve both: one with reliable heating, and one with an en-suite or private bathroom. Get those two right and almost everything else falls into place.
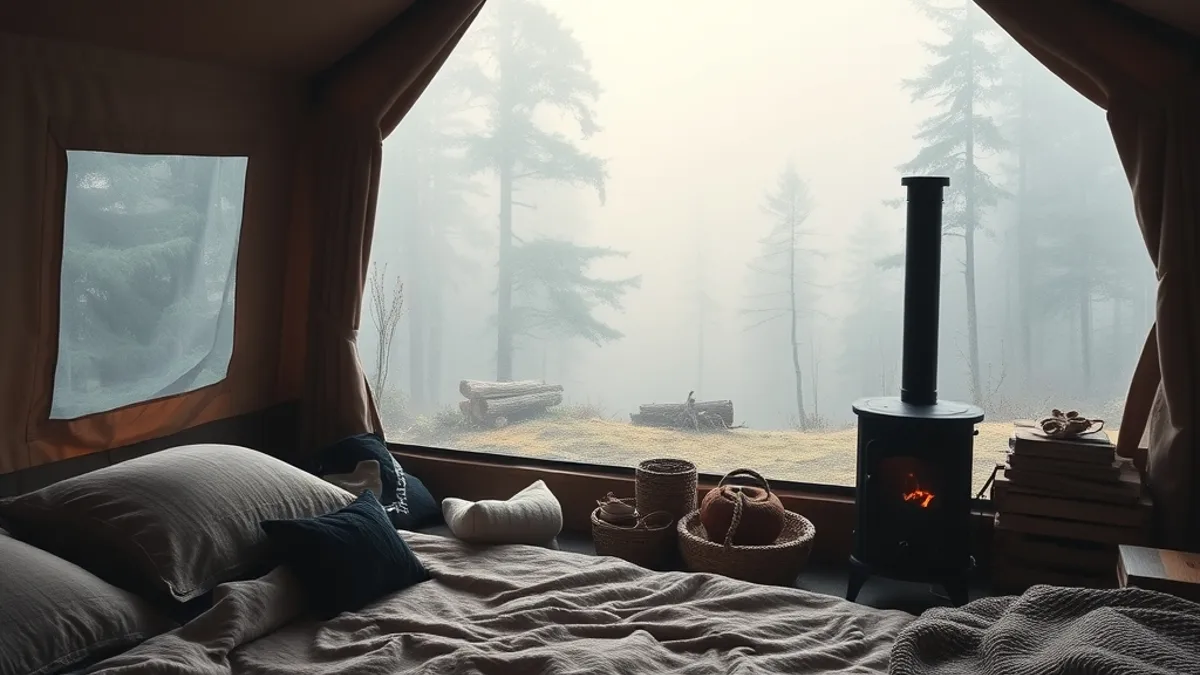
Unit type matters too, especially matched to the season. Safari tents and yurts are wonderful in warm weather but can feel drafty when temperatures drop. Domes and solid-wall cabins insulate better and handle cold nights far more gracefully, making them the safer pick for shoulder-season or high-altitude trips.
Then there’s the detail that defines the whole experience: whether cooking, water and toilets are private, shared or off-site. A unit with a private kitchenette and en-suite bathroom behaves like a small cabin. A unit where you walk five minutes to a shared washhouse behaves like upgraded camping. Both can be great — but only if you know what you booked.
Before you commit, work through this checklist:
- Cooking setup: a full private kitchen lets you self-cater easily, while a shared camp kitchen means planning around other guests and bringing more of your own gear.
- Water access: confirm whether you have running water in the unit or just a communal tap — it affects everything from morning coffee to washing up.
- Toilet arrangements: en-suite, private nearby, or shared block? At 2 am in the rain, this distinction matters more than any other.
- Power supply: some remote units run on solar with limited outlets, which changes how you charge devices and whether a hairdryer is even an option.
When to Book: Seasons, Lead Times and Prices
Timing your booking well can save you serious money and get you better units. In most temperate regions, peak glamping season runs May to September, when the best sites fill up fast. If you have your heart set on a summer weekend at a popular property, book 3-6 months ahead — the most photogenic safari tents and domes are often gone long before the season starts.
Why shoulder season works in your favor
If your dates are flexible, aim for the shoulder months: May, early June and September. Rates during these periods can run 20-40% lower than peak prices, and sites are noticeably quieter — fewer neighbors, easier access to shared facilities, and more attention from hosts. The weather in these months is usually still pleasant enough for canvas accommodation, especially in milder regions.
As for budget, entry-level tent glamping typically costs $100-200 per night, while luxury safari-style units run $250-600+. Prices vary widely by region and what’s included, so treat these as ballpark figures rather than rules.
One more thing to factor in: many sites enforce a minimum 2-night stay on weekends. That means a spontaneous one-nighter is often not an option, so plan your dates around it and check the minimum-stay policy before you fall in love with a particular unit.
Packing for Your First Time Glamping
Packing for a glamping trip sits somewhere between packing for a hotel and packing for a campsite, and first-timers usually err on the hotel side. The biggest mistake is assuming the tent will feel like the daytime. Even in midsummer, nights can drop 10-15°C below daytime highs, so a t-shirt and shorts that felt perfect at lunch will leave you cold by 10 pm. Pack layers you can add and remove easily: a warm midlayer, a proper jacket, and something breathable for the hours when the sun is still up.
The second surprise for most beginners is light and power. Glamping sites are often deliberately dark, which is lovely until you need to find the washroom at midnight. Bring your own light sources and a way to keep your phone charged, since outlets in canvas units may be limited or shared. Beyond that, most of what you’d haul on a camping trip — beds, linens, cooking equipment — is usually handled for you, but “usually” is the key word. Always confirm the specifics with the site before you leave home.
- Headlamp or lantern: a headlamp keeps both hands free for unzipping tent doors or finding things in a dim dome; a small lantern is handy for sitting outside after dark.
- Slip-on shoes: you’ll make several trips outside in the night and early morning, and lacing boots in the dark gets old fast — flip-flops or slip-ons by the door solve it.
- Power bank: since outlets may be limited or absent in tents and yurts, a charged power bank keeps phones, cameras and e-readers running through a multi-night stay.
- Towels: linens usually come with the bed, but towels are frequently excluded — check whether bath and kitchen towels are provided or bring your own.
- Kitchen gear: if your unit has cooking facilities, ask exactly what’s included; some sites supply full cookware and utensils, others only a kettle and bare shelves.
- Firewood: fire pits and wood stoves are common, but wood is often sold on-site rather than included — confirm before assuming a stack will be waiting.
What to Expect on Arrival and During Your Stay
Arrival day at a glamping site runs on a narrower schedule than most hotels. Standard check-in is mid-afternoon, typically 3-4 pm, with late-morning checkout — which means you often have less than 24 hours on a two-night stay to actually enjoy the place. Plan your travel around that window rather than showing up at noon hoping for early access, and if you’re flying or driving a long distance, build in a stop so you’re not arriving stressed and hungry right as check-in opens.
Living inside canvas
The biggest adjustment is sound and temperature. Canvas walls are thin by design: you’ll hear rain drumming, wind moving through trees, and wildlife going about its business at all hours. That’s part of the charm, but it helps to know it coming. Expect noticeable temperature swings at dawn and dusk — the unit can feel warm in the late afternoon and cool again within an hour of sunset. This is exactly why layers matter, and why a stay in a mild region like the lavender-scented countryside of Provence makes an easier first trip than somewhere with dramatic day-night extremes.
Fires, stoves and asking for help
Most wood stoves and fire pits are yours to light yourself. If you’ve never lit a wood stove, this can feel intimidating on a cold first evening — so ask for a walkthrough at check-in. Staff at good sites will happily show you how to open the flue, stack the wood and get a fire going without filling the tent with smoke. It takes five minutes to learn and makes the whole stay more comfortable. If anything else confuses you — the water system, the composting toilet, the outdoor kitchen — ask in that first hour, while staff are nearby, rather than at 11 pm.
Where to Go: Picking a Destination That Suits Beginners
For a first glamping trip, the destination matters as much as the tent. The safest choice is a mild, dry region with an established glamping scene — places where operators have run sites for years, know how to keep canvas units comfortable, and rarely face extreme weather. Mediterranean coasts fit this perfectly, especially in June or September, when the weather is warm and settled but the summer crowds have thinned. The Algarve’s sunlit Atlantic coastline in southern Portugal is a good example of a region that combines gentle conditions with plenty of choice.
Resist the temptation to book a remote wilderness site for your first stay. Isolation sounds romantic until you run out of something essential, the weather turns, or you simply want a restaurant meal. A site within 1-2 hours of a real town gives you supplies, medical care if needed, and a backup plan — all without sacrificing the outdoor setting.
- Forest settings: woodland sites offer natural shade, shelter from wind, and the classic “falling asleep to rustling leaves” experience with relatively stable temperatures.
- Coastal settings: sea breezes keep canvas units cooler in warm weather, and beach days give your trip structure beyond just sitting in the tent.
- Why not mountains: high-altitude sites see sharper cold snaps, sudden storms and thinner air — beautiful, but a lot of variables for a first-timer to manage.
- Why not deserts: desert regions swing between scorching days and genuinely cold nights, and shade is scarce, so packing and unit choice both get harder.
- Check the surroundings: look for sites near a village or small town with a grocery store and pharmacy, so a forgotten item is an errand, not a crisis.
Wrapping Up Your First Glamping Trip
Glamping takes the best of both worlds: real outdoor settings paired with real beds, heating and privacy. The worries that keep first-timers up at night — paying luxury prices for a cold tent or ending up in a site far more rustic than expected — come down to one thing: matching the unit type to your comfort level. Read the description carefully, and you won’t be surprised.
The practical side is simple. Once you’ve picked your dates and destination, the rest is about managing expectations rather than logistics. Confirm what’s actually included before you arrive — towels, kitchen gear, firewood — so you’re not improvising on the first evening. Ask the host anything that’s unclear when you book; good sites answer quickly and honestly, and vague answers are usually a sign to look elsewhere. Choose a mild, well-connected destination for your first trip, and your first time glamping should feel like a comfortable adventure rather than an expensive gamble. If this guide helped you plan your first stay, leave a comment or share it with a friend who’s curious about glamping too.