Glamping alone sounds dreamy until you start wondering whether that remote safari tent or cozy cabin is actually safe and trustworthy for one person. No tentmate to share the drive, no one to check the locks, and a host you have never met at the other end of a booking app. Those doubts are normal, and they are exactly what good preparation can settle.
This guide walks through solo glamping step by step. We explain why glamping alone differs from camping alone, how to vet a site before you pay, how to pick the right location and season, and what to do on arrival and during your stay. A packing checklist and a simple plan for your first solo trip round it out. By the end, you will know how to choose a site that feels welcoming instead of worrying.
Why Solo Glamping Is Different From Camping Alone
Solo glamping and tent camping alone look similar from the outside, but the risks are not the same. When you pitch a tent in the backcountry by yourself, you are genuinely on your own: if something breaks, if the weather turns, or if you get hurt, help can be hours away. Glamping changes that equation in your favor.
Most glamping sites have a host who lives on the property or is reachable by phone or messaging app. That single fact lowers the risk of total isolation. If the heater fails at midnight or you feel uneasy about something, there is a person whose job is to help. You are alone in your unit, not alone on the land.
Your gear is not your lifeline
Then there is the equipment itself. A solid structure with a real bed, proper walls, and working lighting removes the gear-failure risks that make solo tent camping stressful. A snapped tent pole or a leaking rainfly is a genuine problem when you are by yourself; a stuck zipper on a yurt door is an inconvenience you can usually fix or report.
That does not mean solo glamping is risk-free. It simply shifts your concerns. Instead of worrying about survival skills, your main jobs are vetting the site honestly, keeping communication lines open, and handling arrival logistics like daylight check-in and signal coverage. Those are all things you can plan for in advance, which is exactly what the rest of this article covers.
How to Vet a Glamping Site Before You Book
The most important solo safety work happens before you pay a deposit. A glossy listing with beautiful photos tells you nothing about how a site treats a guest arriving alone at dusk. You need to dig a little deeper, and it only takes an extra 20 minutes.
Start with the reviews. Read at least 20-30 recent ones rather than the top three, and filter specifically for mentions from solo or female travelers. Search within reviews for words like “alone,” “solo,” or “night.” A site can be lovely for a family of four and still have a long, unlit path that feels unsettling for one person. Recent reviews matter because hosts change, and a property under new management is a different property.
Next, study the listing itself. A trustworthy listing shows the exact location on a map, states the host’s typical response time, and includes photos of the lighting and paths around the unit, not just the interior. If those details are missing, that is information too.
- Ask direct questions before paying. Message the host with two or three specific questions, such as how check-in works after dark, whether someone is on-site overnight, and what the nearest medical facility is. A slow, vague, or evasive reply is your answer.
- Test how the host communicates. Note not just what they say but how quickly and clearly they respond. Hosts who answer thoroughly before you book usually stay responsive during your stay.
- Keep payments inside the platform. Book through a platform with verified payment protection rather than a direct bank transfer. If something is wrong on arrival, you want a dispute process, not a wire you cannot reverse.
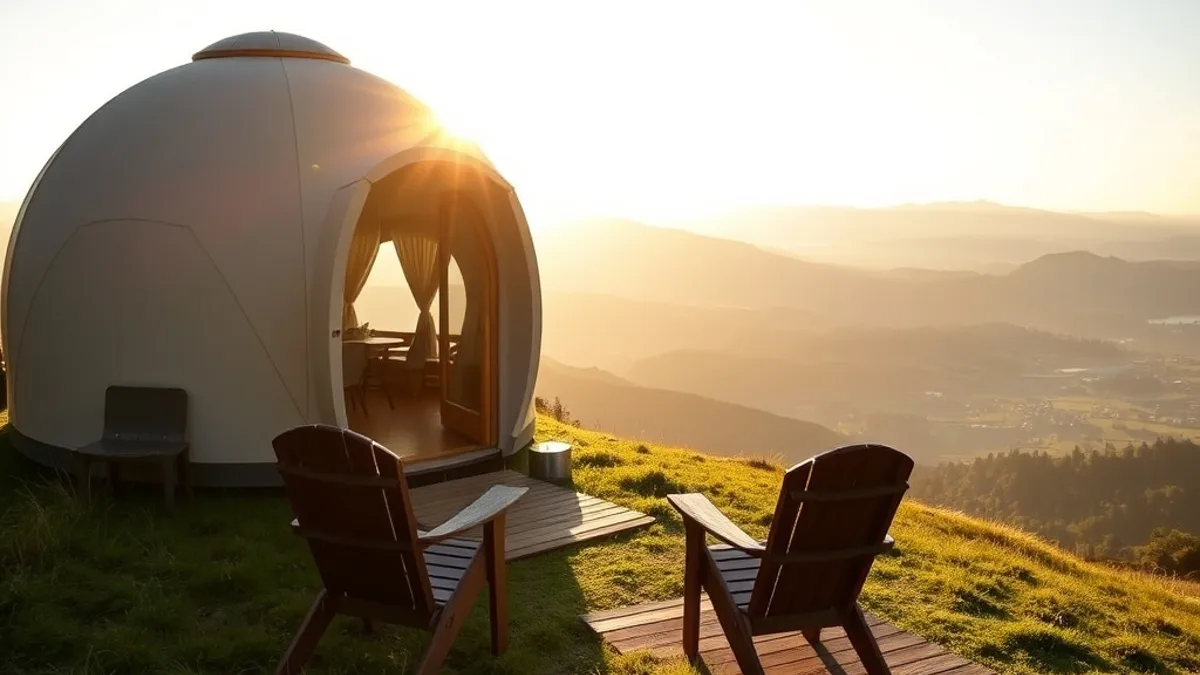
Choosing the Right Location and Season
Where and when you go shapes how safe and relaxed a solo trip feels. The first rule is reachability: pick a site within 30-45 minutes of a town. That keeps supplies, fuel, and help within an easy drive, and it means a flat tire or a forgotten headlamp is an errand, not an emergency.
Season and timing matter just as much. Peak glamping season runs roughly May to September in most Northern Hemisphere destinations, and summer weekends book out fast. For June-August weekends, book 2-3 months ahead. If your schedule is flexible, May and September are the sweet spot: quieter sites, lower rates, and hosts with more time to look after a solo guest.
Budget-wise, expect around $90-250 per night for a quality solo-friendly unit in most regions, depending on the area and the season. If a price sits far below that range in a popular region, look harder at the reviews before committing.
- Think about the final stretch of road. Avoid sites that require a long unpaved drive if you are arriving by rental car at night. Rental agreements often restrict unpaved roads, and finding a washboard track in the dark is nobody’s idea of a calm check-in.
- Match the drive to your arrival time. Ask the host how long the last section takes and whether it is signposted. A 40-minute highway drive is fine after work; a 40-minute gravel climb is not.
- Consider shoulder-season booking windows. For May or September trips, booking around 4-6 weeks ahead is often enough, and you may still have your pick of units.
Arrival and Check-In Safety for Solo Glampers
The first hour at a new glamping site sets the tone for your whole stay, and arriving alone makes that hour the most important one of the trip. Most problems solo travelers report, from unlit paths to doors that do not latch, are easy to spot and fix in daylight but stressful to handle in the dark. Unlike a hotel, there is often no front desk down the hall, so the small practical checks you make on arrival matter even more. Plan your arrival as carefully as you planned the booking itself, and treat the first walk around the site as part of the experience rather than a chore.
- Arrive in daylight, ideally before 6 pm. Daylight lets you walk every path to your unit, test the locks, and check where the lighting actually reaches. If your drive is long, consider booking an earlier check-in window or splitting the trip so you are not pulling up at a rural site after sunset.
- Share your exact location and check-in time with one trusted contact before you lose signal. Send them the map pin, the site name, and when you expect to arrive, and agree on a time you will message them again. This way, someone always knows where you are even if your phone dies or coverage drops out.
- Test the phone signal as soon as you arrive. Walk the site and note the nearest spot with reliable coverage, whether that is the parking area, the porch of your unit, or a rise at the edge of the property. Knowing this in advance saves you from wandering around at night searching for a bar of signal.
- Confirm the host’s emergency number and the nearest medical facility. A well-run site will have both listed, typically with a medical facility within 20-30 km. Save the number in your phone and write it down somewhere physical as well, so it is available even if your battery runs out.
Ten minutes of checking on arrival buys you a calm, comfortable first night. Once you know the paths, the locks, the signal spot, and the emergency contacts, you can settle in and actually enjoy the reason you booked in the first place. If anything feels off, such as a broken latch or a missing lantern, message the host right away while it is still daylight and easy to sort out. Small fixes are quick when someone is on hand, and most hosts would much rather hear from you at check-in than at midnight.
Staying Safe and Comfortable During Your Stay
Once you are checked in, solo glamping is mostly about small habits rather than big precautions. A few minutes of routine each evening keeps you comfortable and lets you relax, because you know the basics are handled. Wildlife, darkness, and simple home security are the three things worth thinking about, and none of them require special gear or skills. They simply ask for a little consistency, the same way you would lock your front door at home without giving it much thought. Most solo travelers find that after the first night, these routines become automatic and the whole stay feels far more relaxed than they expected.
Use the lanterns and headlamps provided for any movement after dark. Wildlife is most active at dawn and dusk, which is exactly when you are most likely to walk to a bathroom or fire pit, so light up your route rather than relying on memory. Paths that felt obvious at check-in can look completely different a few hours later, especially on sites spread out among trees or uneven ground. A headlamp keeps both hands free for opening doors or carrying things, which matters more than you might expect when you are juggling a water bottle and a jacket. Scanning the path ahead for a few seconds before you step out is another easy habit worth building.
- Store food as instructed in bear or fox country. Hosts in these areas usually provide sealed containers, lockable boxes, or a designated storage spot away from sleeping areas. Follow their system exactly, and never keep snacks in a tent-style unit or an open window pouch overnight. If the instructions are not clear, ask before your first night rather than guessing.
- Lock doors and zip windows every night. Even on friendly, low-risk sites with other guests nearby, closing up before bed is a two-minute habit that protects both your belongings and your peace of mind. Check the latch on your first evening so you know how it works before you need it in the dark.
- Plan one daytime activity within driving distance. A short hike, a market visit, or a scenic drive breaks up your stay so you are not on-site 24 hours a day. It also gives you a natural reason to top up supplies and check messages while you have signal.
These habits take less time than making your morning coffee. The goal is not to feel guarded, but to remove the small uncertainties that can otherwise nag at you when you are alone in a beautiful, quiet place. Once the routines are in place, you are free to focus on the parts of the trip you actually came for, whether that is a slow breakfast outside, an evening fire, or simply reading until you fall asleep to the sounds of the countryside.
Solo Glamping Packing Checklist
Packing for solo glamping is lighter than packing for tent camping, since real beds, heating, and lighting are usually provided. What matters is covering the gaps: power, warmth, medical basics, and backup information if technology fails. Think of your list as insurance for the few things the site cannot supply. You do not need expedition gear or a car full of equipment, just a small, deliberate kit that handles the moments when a rural site leaves you to your own devices. Most items on this list are things you probably already own, so the real work is gathering them in one place before you leave rather than buying anything new.
Shoulder season trips deserve special attention. In May and September, nights can cool sharply even after warm days, and a drop of 10-15 degrees between afternoon and bedtime is common. Layers you can add or remove beat one heavy jacket, because you can fine-tune your warmth while reading or stargazing outside your unit. The same logic applies to your other gear: a headlamp that seemed unnecessary on a long summer evening becomes essential once darkness falls early, and a power bank you would skip on a well-wired site earns its place when outlets are limited.
- Headlamp, power bank, and offline maps. Download your offline maps before you leave home, while you still have fast internet, since rural coverage can be patchy on arrival. A power bank sized for at least one full phone charge covers you if the unit’s outlets are limited or the power flickers.
- Layers for cold nights. Pack a warm mid-layer, a windproof outer layer, and warm socks even in milder months. That 10-15 degree evening drop feels bigger when you are sitting still outside than it does when you are hiking.
- Basic first-aid kit plus personal medication in original packaging. Include blister plasters, antiseptic wipes, and pain relievers for minor issues, since the nearest pharmacy may be back in town. Keep any prescription medication in its original packaging so it is easy to identify if you need help from anyone else.
- A printed copy of booking details and host contacts. Phones fail, batteries drain, and screens become hard to read in the cold. A printed sheet with your booking confirmation, the host’s number, and the site address means you can still find your way and reach help if every device dies.
Everything on this list fits in a small daypack, which is exactly the point. Pack it once, keep it together in one bag or pouch, and repack it the same way each morning so nothing wanders off. With these basics covered, you will spend your trip enjoying the quiet instead of worrying about what you forgot.
Your First Solo Glamping Trip, Made Simple
Glamping alone sounds dreamy until you start wondering whether a remote tent site is a sensible choice for someone traveling by themselves. The reassuring part is that most solo risks come down to three simple habits: vetting the site before you book, choosing a location within easy reach of a town, and arriving in daylight so you can inspect your surroundings calmly.
If this is your first solo trip, aim for the shoulder season. May and September bring quieter sites, lower rates, and a gentler introduction than a busy summer weekend. Once you have read the reviews, messaged the host, and shared your plans with someone at home, solo glamping becomes one of the safest and most rewarding ways to travel alone. Have you tried it yet, or do you have a tip of your own? Leave a comment or share this article with a friend who is thinking about their first solo trip.