Glamping promises comfort in the wild, yet first-timers often arrive without the small essentials that make a luxury tent or cabin feel truly effortless. You book a safari tent with a proper bed and a wood stove, then discover at dusk that you have no lantern, no warm socks and no way to charge your phone. A well-planned glamping trip comes down to packing smart, not packing more.
This practical checklist walks you through everything that matters: clothing layers for cool evenings, bedding and sleep comfort, lighting and power, kitchen and water gear, toiletries and weather protection, plus how to book the right site and time your reservation. Follow it, and you will arrive prepared for everything the site does not provide.
Clothing and Layers for a Glamping Trip
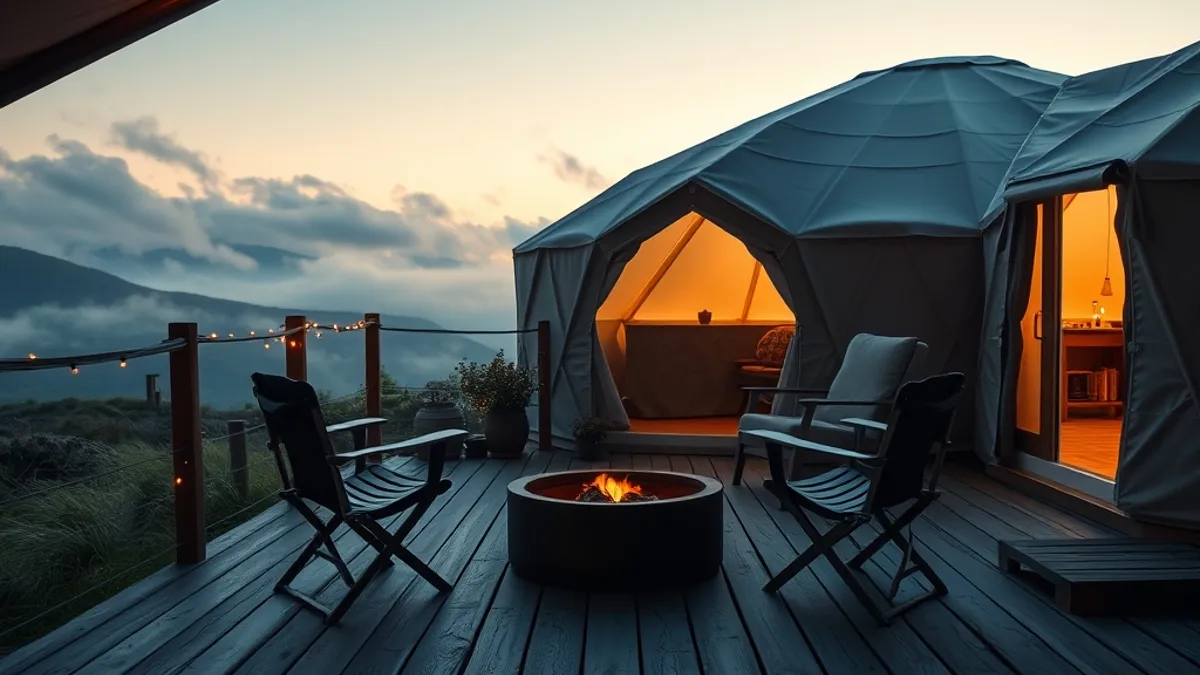
Glamping sites rarely have heating that matches a hotel room, so clothing is your first line of defense. The trick is to think in three layers rather than one thick jacket. A breathable base layer wicks sweat away during daytime activities, a fleece or wool mid-layer traps warmth, and a windproof shell blocks the chill that picks up around fire pits and open fields after dark. Canvas and tent fabric insulate far less than solid walls, so the temperature you feel inside your unit can drop noticeably once the sun goes down, even after a warm afternoon.
Fabric choice matters as much as layering. Cotton jeans and hoodies feel cozy at home but stay damp for hours in humid or rainy conditions, leaving you cold and uncomfortable. Quick-dry synthetics and merino wool handle morning dew, sudden showers and sweaty hikes far better, and merino resists odor if you are packing light for a multi-day stay. Footwear deserves the same thought: you will move between tent deck, trail and camp facilities constantly, so two pairs cover all bases. Pack everything in a 20-30 liter daypack for short hikes from your base, and check the forecast for your dates before finalizing what goes in the bag.
- Base layer: choose merino or synthetic long-sleeve tops that work alone on warm days and under a fleece at night, so one item serves two purposes.
- Mid-layer: a zip-up fleece beats a pullover because you can vent heat quickly when walking and zip up the moment you stop.
- Shell: a lightweight windproof jacket also doubles as rain protection, saving space in your bag.
- Footwear: slip-on shoes or sandals keep the tent deck clean and make midnight trips outside easy, while one sturdy pair handles muddy or rocky trails.
- Extras: a beanie and warm socks belong in your bag even in summer, since canvas tents lose heat fast after sunset and cold feet ruin sleep.
Bedding, Sleep Comfort and Tent Essentials
Nothing shapes a glamping trip more than how well you sleep, and sleep quality depends heavily on what the site actually provides. Many safari tents come with made-up beds, duvets and pillows, while basic yurts and bell tents sometimes offer only a bare mattress or nothing at all. Send the site a quick message before you pack and ask exactly what is included: bed linens, pillows, duvets, extra blankets and even mattress type all vary between units on the same site. Hauling a duvet you did not need wastes car space, while arriving to a naked mattress with no bedding is a far worse surprise. If you are renting linens on-site, confirm the fee and whether they are delivered to your tent or collected from reception, since policies differ and you do not want to hunt for bedding in the dark after a long drive.
Even with proper bedding, canvas walls behave differently from hotel walls. They let in early dawn light, carry every owl hoot and rustling animal, and cool down quickly once the stove dies overnight. A few small items solve all three problems without adding meaningful weight to your bag, and together they take up less room than a single pair of boots.
- Sleeping bag liner: a silk or fleece liner adds a noticeable layer of warmth when nights drop below 10°C, and it keeps shared or rented bedding feeling fresh.
- Earplugs: foam pairs weigh almost nothing and mute wildlife sounds, snoring travel companions and wind flapping against canvas.
- Sleep mask: canvas lets dawn light in early, and a mask lets you sleep past sunrise without rigging blackout solutions.
- Camp blanket: a lightweight throw works as an extra bed layer and doubles as a wrap for evenings spent outside the tent.
Lighting, Power and Tech to Pack
Lighting and power are where first-time glamper expectations and reality collide hardest. Many glamping sites rely on low or dim ambient lighting, and outlets are often limited to the main lodge rather than your tent. Once the sun sets, you will want hands-free light for cooking, reading, playing cards and finding the path to the bathroom block, so plan for each person to carry their own light source rather than sharing one between the group.
Connectivity deserves the same planning. Remote sites frequently have weak or nonexistent signal, so anything you want to use offline must be loaded before arrival. Download maps for the area, playlists, podcasts and any reading material while you still have home wifi. And think twice before packing appliances: campsite circuits are not built for high-wattage devices, and a hair dryer can trip a breaker for the whole site, leaving everyone without power until staff reset it.
A few practical habits make the evenings easier. Keep your headlamp clipped to your pillow or bed frame so you can find it instantly, and set the lantern on the tent table before dark rather than searching for it by phone screen. If your unit sits away from the main area, a second light near the door helps on late trips to the bathroom block.
- Headlamp per person: one each, with fresh batteries, keeps hands free for cooking, games and nighttime walks; a headlamp or lantern per person is essential where lighting is dim.
- Small lantern: hang one on the tent table or hook for ambient light, and place another near the path if your unit sits away from the main area.
- Power bank: a 10,000-20,000 mAh model covers 2-3 nights of phone charging when outlets are limited to the lodge.
- Offline content: download maps, playlists and any reading material before you arrive, since remote sites have weak signal.
- Leave behind: skip hair dryers and other high-wattage devices that overload campsite circuits and can cut power for everyone.
Kitchen, Food and Water Gear
Food can make or break a glamping trip, and the difference usually comes down to planning. Some sites have full camp kitchens with stoves and sinks, while others leave you with a fire pit and a picnic table. Even the best-equipped communal kitchen can be busy at dinner time, so it pays to bring your own basics rather than rely on what is provided.
Water is the first thing to sort out. A 0.75-1 liter reusable bottle per person covers most sites that don’t have potable taps at the unit itself. If you have to walk to a shared tap or fill up at the main lodge, a larger bottle means fewer trips, especially on cold mornings.
When it comes to cooking, keep it simple. Meals that need one pan, or that can be wrapped in foil and cooked over coals, save you from piles of washing up with limited water. Think one-pan pastas, grilled vegetables, foil-baked fish and breakfast wraps. Pack a cooler bag with ice packs for anything fresh, and decant staples like oil, salt and spices into small containers so you are not hauling full bottles.
- Sharp knife with a sheath or blade guard – the one tool camp kitchens most often lack, and the difference between chopping vegetables easily or struggling with a blunt paring knife.
- Small flexible cutting board – rolls up in your bag and gives you a clean surface even when the shared counters are crowded or damp.
- Spork and one bowl per person – covers every meal from porridge to stew without needing a full set of plates and cutlery.
- Compact coffee setup – a pour-over cone or French press plus pre-ground coffee, since even sites with kitchens rarely provide a proper brew.
- Sealed storage containers or a dry box – essential for keeping food in the provided locker overnight, and doubles as a crumb-proof place to stash snacks during the day.
- Bin bags and a sponge – wildlife is drawn to rubbish as much as food, so you need a way to seal waste and wipe down surfaces after each meal.
Toiletries, Towels and Weather Protection
Glamping bathrooms vary enormously. Some units have private en-suite facilities with hot showers, while others rely on shared bathroom blocks a short walk from your tent. Either way, the packing logic is the same: keep everything quick-drying, compact and easy to carry in one small bag.
Many eco-focused sites require biodegradable soap and shampoo, or strongly encourage them, because greywater often goes straight into the ground or a septic system. Check the site’s guidelines before you go, and choose solid bars rather than bottles where you can – they last longer, leak less and weigh almost nothing.
Quick-dry microfibre towels are the standard for a reason. They pack down to the size of a paperback, hang dry in a couple of hours and never come off the towel rail still damp. Slide-on sandals protect your feet in shared showers and on the wet grass between your tent and the bathroom block, which is a walk you will make more often than you expect.
- Reef-safe sunscreen – a lower-impact formula matters if your site is near lakes, rivers or coastline, and a stick format avoids liquid limits if you are flying.
- Insect repellent – canvas tents are not airtight, so bites are common at dusk; a pump spray plus a small repellent wipe pack covers both tent time and trail time.
- Small first-aid kit with blister plasters – add antiseptic wipes and tweezers for splinters, since the nearest pharmacy can be a long drive from a remote site.
- Packable rain shell – a lightweight jacket that folds into its own pocket handles sudden downpours without taking up shelf space in the tent.
- Dry bags or zip pouches – keep electronics, documents and spare clothes dry inside a damp tent, and sort your toiletries so a leak doesn’t ruin everything else.
- Toiletry bag that hangs – hooks are scarce in shared bathroom blocks, and a hanging bag keeps everything off wet counters.
Booking Timing and Choosing the Right Glamping Site
The best glamping units sell out first, and timing matters more here than with most hotel bookings. For summer weekends, aim to reserve 2-4 months ahead. For the peak of July-August, book 6 or more months in advance, especially if you want a specific unit type like a dome with a view or a safari tent with a private deck.
Before you pay a deposit, get a clear picture of exactly what is included. Linens and duvets, kitchen access, a private bathroom or shared facilities – each of these changes what goes in your bag. A site with a wood stove and provided firewood needs a very different packing list from a basic yurt with no heating.
Shoulder seasons like May-June and September can be lovely, with warm days and fewer crowds, but nights can drop below 10°C. Ask directly about heating and insulation before committing. If you’re considering a destination with genuinely changeable weather, it’s worth reading about homes built for Atlantic weather and deep Irish quiet to see how the right setup handles wind and rain.
- Ask about the heating source specifically – a wood stove you feed yourself, an electric heater or nothing at all each demand different clothing and bedding choices.
- Check seasonal access roads – some forest and coastal sites have tracks that become difficult in wet months, which affects both arrival and whether facilities stay open.
- Confirm which facilities close off-season – a camp kitchen, shower block or reception that runs full-time in summer may operate reduced hours in the shoulder months.
- Match unit type to weather exposure – forest domes are sheltered but can feel damp, while coastal tents get views and wind in equal measure; pick based on the conditions you actually enjoy.
- Read the cancellation terms before booking early – reserving 6 months out means more chance of plans changing, so know your options for moving dates.
- Ask about arrival logistics – some sites require check-in before dark or a walk-in from a car park, which affects how much gear you can realistically bring.
Pack Smart, Glamp Easy
Glamping should feel effortless, and it does when the small essentials are already in your bag. Layered clothing, a sleep liner, a headlamp, a reusable bottle and biodegradable toiletries cover nearly every situation a tented stay throws at you, from chilly evenings to dim paths after dark.
The other half of packing smart happens before you zip a single bag: confirm what the site provides so you don’t double up on bedding and kitchen gear, and remember that booking 2-4 months ahead secures the best units for peak-season trips. Pack with that checklist in hand, and your luxury tent will feel like home from the first night. If this helped you plan your trip, leave a comment or share the article with a fellow traveler.